Stepped Demonstrations - Goscar Rock, Tenby
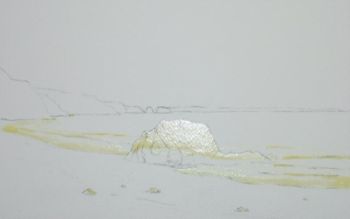
1.
1. Draw out the image on stretched Arches 140lb NOT paper 10”x 6.5”. I always used stretched paper. Attempting to paint on paper that develops a series of cockles can be a very frustrating task. Why make life difficult?
2. Apply colourless masking fluid to sunlit faces of the rocks and the foam areas of the waves.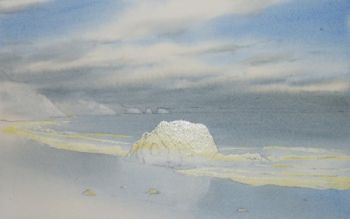
2.
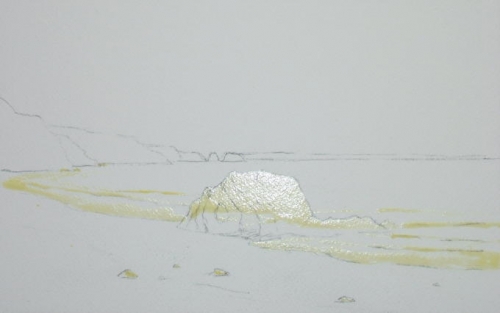
1. Colours to be used are cobalt blue, burnt sienna, raw sienna and Chinese white – Winsor & Newton Cotman series.
2. Mix two stiff washes – one of cobalt blue and another of cobalt blue and burnt sienna to give a cool grey.
3. Wet the paper thoroughly and, using the cobalt, paint the blue area, leaving the clouds white. Whilst the surface is still damp, apply the grey colour to the undersides of the clouds. This should give them soft edged three- dimensional appearance.
4. Lift out the sunlit edges of the distant cliffs and rocks.
If you wish to purchase brushes for painting skies I would recommend a ‘Frank Clark Baby Goat’ or a Terry Harrison 1” Golden Stroke. I prefer to make my own by modifying small hakes. I shall be describing the process in a future demonstration.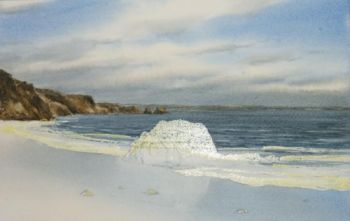
3.
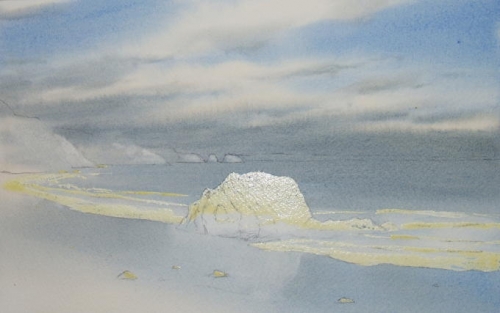
1. Using a light mixture of all three colours, paint the distant headlands with a size 6 round brush squeezed flat and almost dry. The resulting soft edges will recede into the distance - where they should be!
2. Paint the sea area horizontally, getting darker towards the front. Suggest varied wave movement and lift out colour on the crests. Having a very limited palette tends to make colour selection much simpler and often leads to a more cohesive painting. It also encourages us to concentrate more effectively on tonal values.
3. Paint the cliffs on the left a light tone of burnt and raw sienna and allow to dry. Apply the darker shadow areas in the cliffs and headlands leaving each layer to dry before adding the next. Do this with a size 4 round brush squeezed flat. A scumbling action, I find, helps to deliver a broken, rugged effect.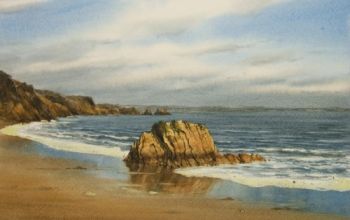
4.
1. Remove the masking fluid from both the central rock and all the waves except the nearest.
2. Paint the rock with light burnt and raw sienna. Dry brush with slightly stronger paint to give a textured effect and subtle, soft edged changes in colour and tone.
3. Apply darker tones in the shadow areas to make the rock appear both solid and detailed. Use a size 0 rigger to pick out the fracture lines.
4. Darken the wave fronts and soften the lower curved sections with a damp brush.
5. Wet the entire beach and brush in the reflections of the sky and rock details before painting the dry sand area. Do everything whilst the surface is still damp in order to preserve the soft edges.

5.
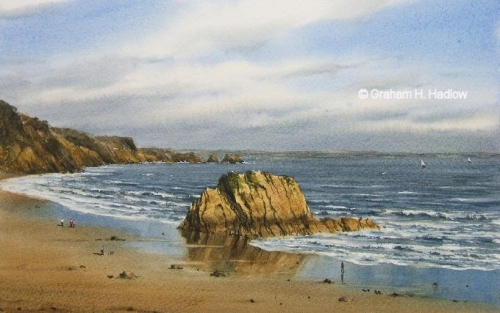
1. Remove the remaining masking fluid. Paint the breaking waves with a size 6 round brush aiming for a random effect. Try squeezing the brush flat and applying the moist paint in a series of dabs. Take care not to have too many hard edges or the water will look frozen.
2. Overlay some of the beach colour with dry brush to emphasise the sand effect.
3. Paint the shadow side of the small rocks. Figures give the scene life and a sense of scale. Use a size 0 rigger and always paint the body and legs first, and the head last. When the head is painted first the figures often tend to be too large.


 |
|  |
| 
Copyright © Graham H Hadlow Watercolours. All rights reserved.